
⭐️푸쉬 알림 (Notification)⭐️
개인적인 유저 입장에서는 푸쉬 알림(노티)이 귀찮아서 대부분 끄지만..
광고나 주기적인 앱 사용 촉진을 위해서는 푸쉬 알림이 유용하다고 생각한다.
서버단에서 데이터를 받아와서 푸쉬를 보내는 경우가 많겠지만 이번에는 서버통신 없이
로컬에서(앱 내 데이터를 바탕으로) 푸쉬 알림을 보내는 방법을 정리해보고자 한다.
먼저 '시간' , '날짜', '위치' 기반으로 푸쉬를 보내는 방법을 다루고자 한다.
이전 사운드, 햅틱과 같이 싱글톤 패턴을 통해 푸쉬를 보내보자.
//  Created by Toughie on 2023/05/24.
//

import SwiftUI
//노티를 보내기 위한 프레임워크
import UserNotifications
//위치 정보를 위한 프레임워크
import CoreLocation

final class NotificationManager {
    static let shared = NotificationManager()
    ...
1. 알림을 보내기 위해 유저의 권한 받기.
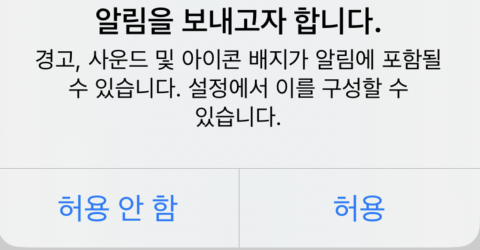
    func requestAutorization() {
    //경고, 사운드, 배지 알림이 포함될 수 있다는 옵션
        let options: UNAuthorizationOptions = [.alert, .sound, .badge]

        UNUserNotificationCenter.current().requestAuthorization(options: options) { success, error in
            if let error = error {
                print("Push Noti Denied: \(error.localizedDescription)")
            } else {
                print("Push Noti Access")
            }
        }
    }
여기서 유저가 '허용'을 눌러야 노티를 보낼 수 있다.
2. 푸쉬알림 스케쥴링
푸쉬를 언제 보낼 것인지 설정하는 부분이라 생각하면 된다.
여기서는 푸쉬 컨텐츠 -> 트리거 -> 리퀘스트 순으로 작성한다.
푸쉬 컨텐츠
제목, 부제목, 사운드, 뱃지 등 여러 세부 설정이 가능하다.
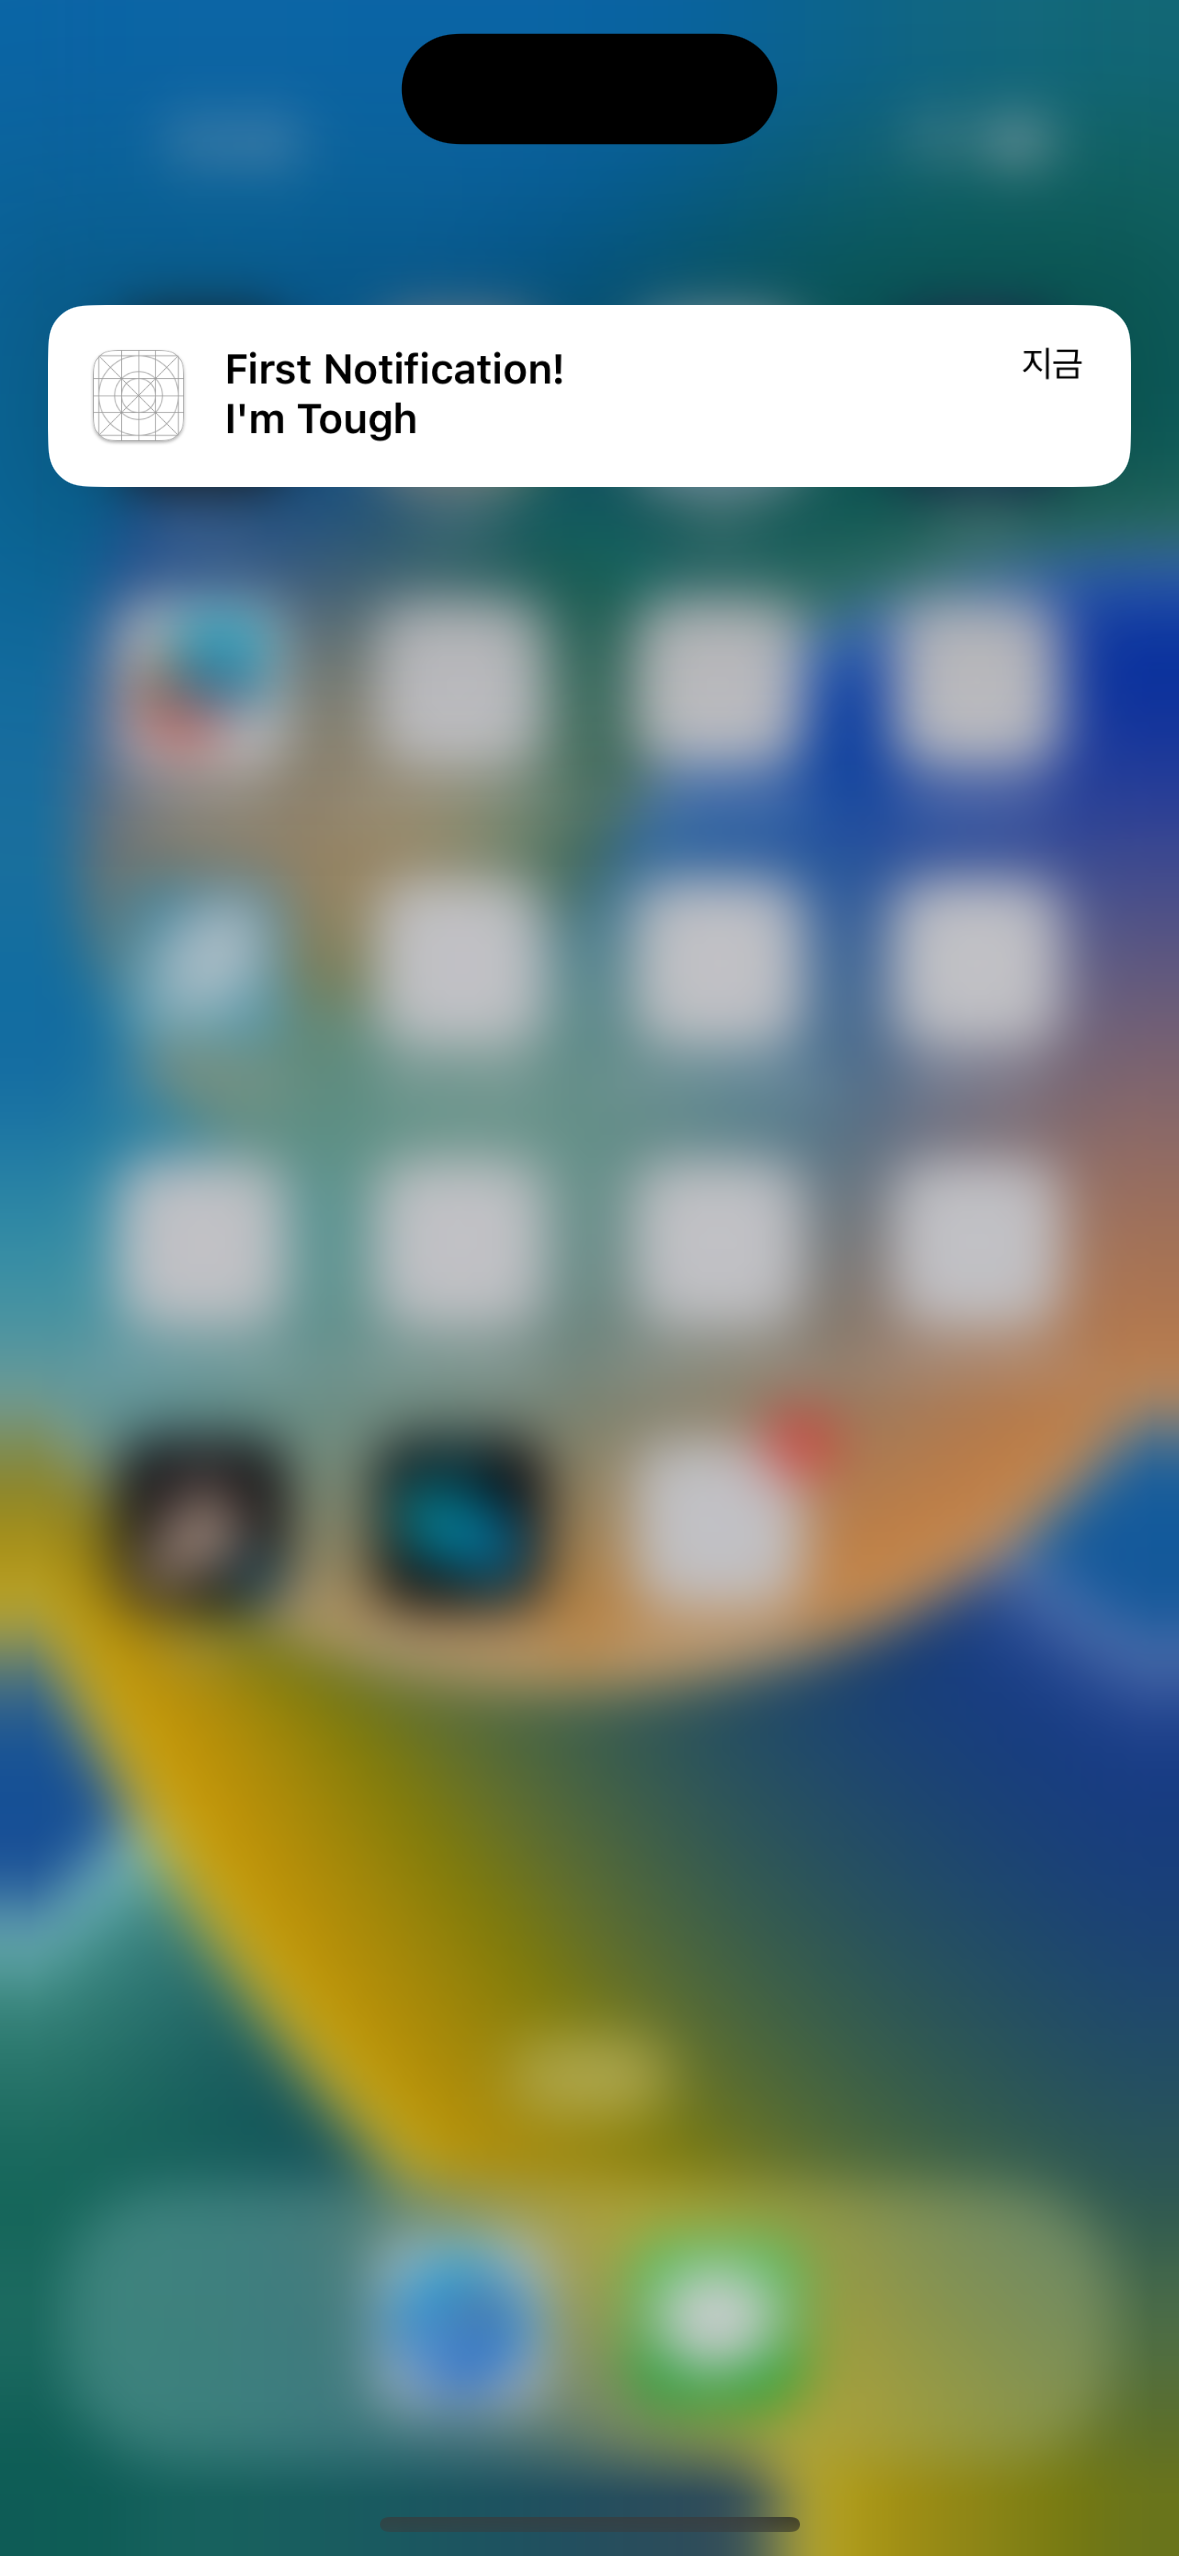
func scheduleNotification() {

        let content = UNMutableNotificationContent()
        content.title = "First Notification!"
        content.subtitle = "I'm Tough"
        content.sound = .default
        content.badge = 1

...
트리거 (말 그대로 특정 트리거에 기반해 푸쉬를 날림)
A. 일정 시간 이후
let trigger = UNTimeIntervalNotificationTrigger(timeInterval: 5.0, repeats: false)
//5초 뒤에 푸쉬, 반복여부 설정 가능
B. 특정 일자, 시간 기준
//먼저 DateComponents 인스턴스를 만들어 준다.
var dateComponents = DateComponents()
//몇 시?
dateComponents.hour = 21
//몇 분?
dateComponents.minute = 19
//무슨 요일? *1이 일요일이다.
dateComponents.weekday = 4
/추가적으로 다양한 세부 설정이 더 가능하다.

let trigger = UNCalendarNotificationTrigger(dateMatching: dateComponents, repeats: true)
//위에서 설정한 조건에 따라 저 시점만 되면 반복적으로 푸쉬 알림이 간다.
C. 위치 기반
//좌표 설정
let coordinates = CLLocationCoordinate2D(latitude: 37.00, longitude: 127.00)

//지역 설정
let region = CLCircularRegion(
	    //중심점 -> 위에서 설정한 좌표
	    center: coordinates,
			//반경 몇 미터?
            radius: 1_000_0000,
			//식별자
            identifier: UUID().uuidString)

//해당 지역에 진입했을 때 노티를 보낼 것인가
region.notifyOnEntry = true
//해당 지역에서 벗어났을 때 노티를 보낼 것인가
region.notifyOnExit = false

let trigger = UNLocationNotificationTrigger(region: region, repeats: true)
리퀘스트
위에서 작성한 콘텐츠, 트리거를 통해 푸쉬 리퀘스트를 작성한다.
let request = UNNotificationRequest(
identifier: UUID().uuidString,
content: content,
trigger: trigger)

//NotificationCenter에 추가해준다.
UNUserNotificationCenter.current().add(request)
3. 푸쉬 취소/삭제
    func cancelNotification() {
        //예약된 푸쉬 삭제
        UNUserNotificationCenter.current().removeAllPendingNotificationRequests()
        //이미 푸쉬 온 알림들(알림센터에 떠있는) 제거
        UNUserNotificationCenter.current().removeAllDeliveredNotifications()
    }
'SwiftUI > SwiftUI(Intermediate)' 카테고리의 다른 글
| 9. RotationGesture/effect 회전 애니메이션 (0) | 2023.05.25 |
|---|---|
| 8. MagnificationGesture (확대/축소) (0) | 2023.05.25 |
| 6. Haptic 진동 (0) | 2023.05.24 |
| 5. AVAudioPlayer 사운드 재생/ 열거형 (원시값,연관값) (0) | 2023.05.23 |
| 4. typealias 타입앨리어스 (0) | 2023.05.22 |


