

🦁Protocol 프로토콜🦁
코드를 치다보면 거의 매번 마주치는 프로토콜.
프로토콜이 무엇이고 왜 사용하는 것인가?에 대해 살펴보자.
프로토콜은 필수 요구조건들을 나열해둔 것.
프로토콜은 자격증과 같다. 왜? 요구조건들을 만족하면 새로운 속성,기능을 얻을 수 있으니까.
프로토콜은 코드에 '재사용성'과 '유연성'을 부여한다.
프로토콜은 특정은 추상화 과정에서 사용된다.
이런 저런 중복 코드가 많은 경우에 해당 코드들을 쏙 뽑아 프로토콜로 추상화 하면 더 유연하고 깔끔한 코드를 만들 수 있다.
프로토콜은 '요구사항'을 정의하고, 이 요구사항의 구현은 프로토콜을 채택한 타입에서 진행한다.(프로토콜 준수)
프로토콜에는 프로퍼티, 메서드, 생성자, 서브스크립트 등 여러 멤버 요구사항을 정의할 수 있다. (정의만 해둔다.)
⭐️프로토콜은 코드의 재사용성과 유연성을 향상시키는데 사용된다.
여러 타입들 간에 공통된 속성, 동작을 정의함으로써 다형성을 구현할 수 있다.
프로토콜은 클래스, 구조체, 열거형 등 커스텀 타입에서 채택될 수 있고, 한 타입이 여러 프로토콜을 동시에 채택할 수도 있다.
-> 이는 코드 간 결합도를 낮추고, 유연하고 확장 가능한 코드를 작성할 수 있게 함. -> Swift의 프로토콜 지향 프로그래밍 !
예시
만약 한 뷰에서 여러가지 컬러를 사용한다고 치자. 편의를 위해서 이를 구조체로 선언해 둔다. (color extension도 되겠지만..)
struct FirstColorTheme {
    let primary: Color = .blue
    let secondary: Color = .white
    let tertiary: Color = .gray
}
이를 뷰에서 사용한다면 아래와 같을 것이다.
struct ProtocolsPrac: View {

    let colorTheme: FirstColorTheme

    var body: some View {
        ZStack {
            colorTheme.tertiary.ignoresSafeArea()

            Text("hi")
                .font(.headline)
                .foregroundColor(colorTheme.secondary)
                .padding()
                .background(colorTheme.primary)
                .cornerRadius(10)
                .onTapGesture {
                    dataSource.buttonPressed()
                }
        }
    }
}
엇 그런데 갑자기 디자이너의 요청으로 컬러를 변경해야 한다면?
FirstColorTheme에 가서 직접 컬러를 변경할 수도 있다.
하지만 미리 만들어둔 구조체를 직접 변경하는 것은 그닥 좋아보이지 않는다.
그래서 그냥 새로운 구조체를 만들기로 한다. ver2 느낌으로.
struct SecondColorTheme {
    let primary: Color = .pink
    let secondary: Color = .white
    let tertiary: Color = .green
}
짠 이제 이걸 쓰려면 뷰의 코드를 아래와 같이 수정해야 한다.
why? FirstColorTheme과 SecondColorTheme은 아예 다른 타입이니까.
struct ProtocolsPrac: View {

    let colorTheme: FirstColorTheme

    var body: some View {
        ZStack {
            colorTheme.tertiary.ignoresSafeArea()

            Text("hi")
                .font(.headline)
                .foregroundColor(colorTheme.secondary)
                .padding()
                .background(colorTheme.primary)
                .cornerRadius(10)
        }
    }
}
근데 가만히 보면.. 결국 안에 Color 프로퍼티 3개가 있는건데 구조체를 중복해서 만드는 모습이 비효율적이지 않은가?
여기서 Protocol의 힘을 빌릴 수 있다.
protocol ColorThemeProtocol {
    //requirements
    var primary: Color { get }
    var secondary: Color { get }
    var tertiary: Color { get }
}
프로토콜은 이렇게 사용할 수 있다. 클로저 내부에 필요한 요구사항을 작성한다. 프로퍼티, 메서드 등..
먼저 프로퍼티 선언은 무조건 'var'로만 가능하다. 왜 let으로 선언하지 못하는 지 궁금하지 않은가?
프로토콜은 '유연성'이 핵심이다. 프로퍼티 같은 경우에는 읽기전용, 읽기 쓰기 둘 다 가능으로 선언할 수 있는데
let으로 선언해 버리면 쓰기가 안 되니까 유연하지 못하다.
var primary: Color { get set }이렇게 하면 primary 프로퍼티는 읽기도 쓰기도 되는 것이다.
위 예시에서 { get }으로 선언된 요구사항들은 실제 구현부에서는 let으로 선언해도 된다. 어차피 get만 가능하니까!
실제 구현부에서 let, var 중에서 개발자가 원하는 것으로 유연하게 정할 수 있는 것이다.
프로토콜을 사용하면 대체 뭐가 유연하고 재사용성이 좋고 확장성이 좋아지는 지 알 수 있는 부분이다.
먼저 프로토콜을 기존의 컬러테마 구조체들에 채택시켜준다. 이미 요구조건을 다 만족하기 때문에 바로 가능하다.
내친김에 컬러테마도 하나 더 추가해보자.
struct FirstColorTheme: ColorThemeProtocol {
    let primary: Color = .blue
    let secondary: Color = .white
    let tertiary: Color = .gray
}

struct SecondColorTheme: ColorThemeProtocol {
    let primary: Color = .pink
    let secondary: Color = .white
    let tertiary: Color = .green
}

struct ThirdColorTheme: ColorThemeProtocol {
    var primary: Color = .mint
    var secondary: Color = .white
    var tertiary: Color = .purple
}
뷰에서 쓰기 전에 생각해보면, 프로토콜을 채택하기 전에는 각각의 타입을 따로 바꿔줬어야 했다.
let colorTheme: FirstColorTheme
let colorTheme: SecondColorTheme
let colorTheme: ThirdColorTheme
이렇게 말이다. 사실 이러면 해당 뷰는 각각의 타입에 매우 의존적인 상태가 된다.
의존성 주입을 다루면서 다시 살펴보겠지만, 각각의 타입에 의존하기 보다는 중간에 프로토콜을 끼워넣어서
둘 간의 결합도를 낮춰버리자.
struct ProtocolsPrac: View {

    let colorTheme: ColorThemeProtocol

    var body: some View {
        ZStack {
            colorTheme.tertiary.ignoresSafeArea()

            Text("Beautiful")
                .font(.headline)
                .foregroundColor(colorTheme.secondary)
                .padding()
                .background(colorTheme.primary)
                .cornerRadius(10)
        }
    }
}
이제 colorTheme에는 ColorThemeProtocol을 채택한 모든 타입이 올 수 있다.
세계관이 훨씬 확장된 느낌이지 않은가? 이제 이 뷰를 초기화 할 때 아래와 같이 할 수 있게 됐다.
ProtocolsPrac(colorTheme: FirstColorTheme())
ProtocolsPrac(colorTheme: SecondColorTheme())
ProtocolsPrac(colorTheme: ThirdColorTheme())
프로토콜에서 프로퍼티는 봤으니 이제 메서드도 넣어보자.
지금 Text 부분에 String Literal이 들어가 있으니 이 부분을 바꿔보자.
클래스를 통해 데이터를 받아온다고 가정하고, 클래스에는 텍스트가 꼭 필요하니 이를 프로토콜로 우선 구현한다.
그리고 텍스트를 탭했을 때 프린트가 찍히도록 메서드도 추가해주자.
class DefaultDataSource: ButtonTextProtocol {
    var buttonText: String = "PROTOCOL"

    func buttonPressed() {
        print("Button was pressed")
    }
}

protocol ButtonTextProtocol {
    var buttonText: String { get }
}
자 이것을 뷰에 적용해보면,
DefaultDataSource는 ButtonTextProtocol을 채택했으니, dataSource: ButtonTextProtocol로 해줬다.
그리고 내부에 buttonPressed 메서드에 접근하려 하면 아래와 같은 에러가 발생한다.
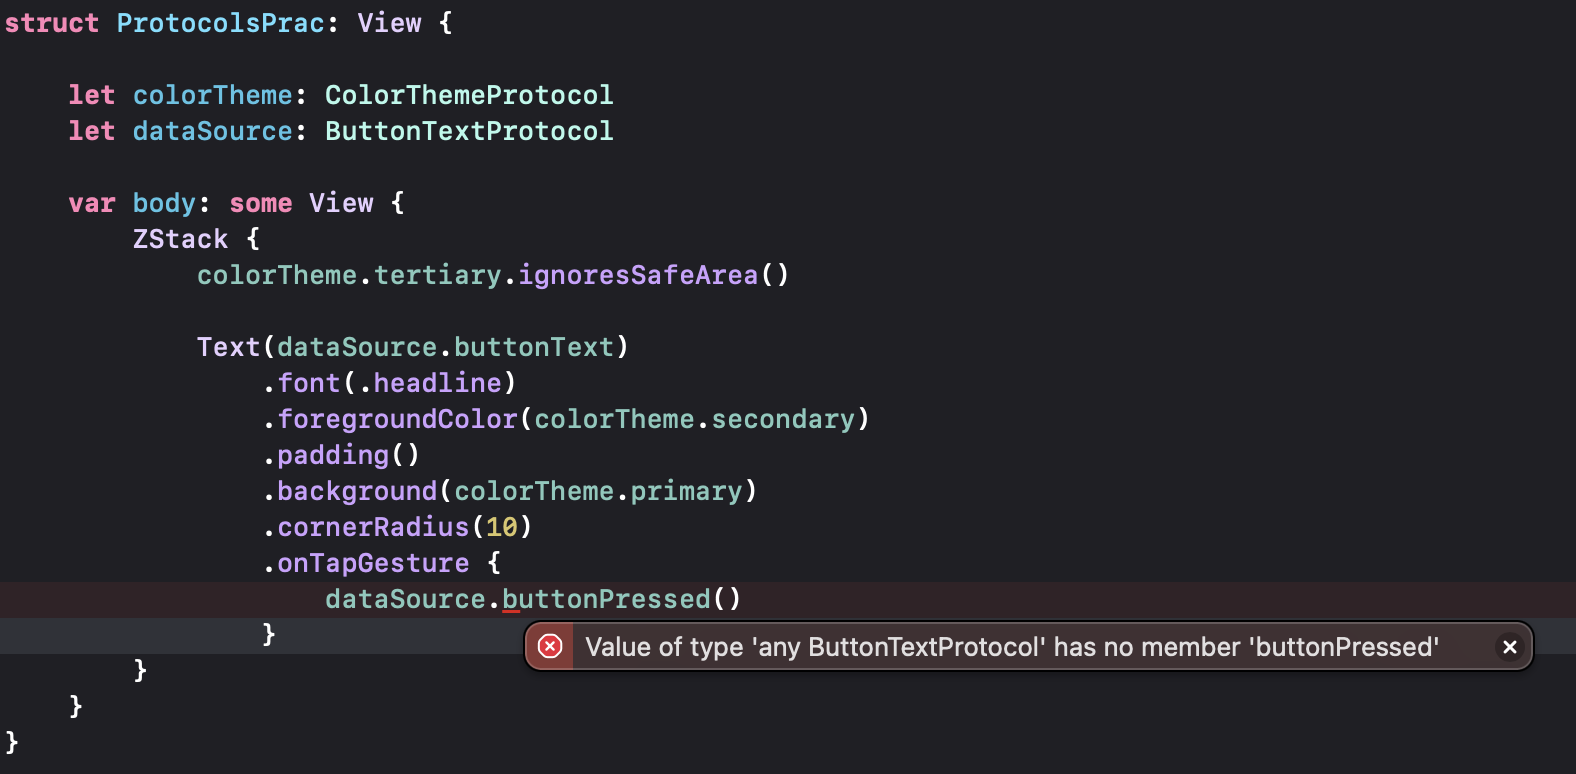
에러는 말 그대로 ButtonTextProtocol에는 buttonPressed라는 멤버가 없다는 것이다.
해당 프로토콜에는 그저 buttonText밖에 없기 때문에 인식을 못하는 것이다.
엇 그러면 메서드를 위한 프로토콜을 하나 만들어주자.
protocol ButtonPressedProtocol {
    func buttonPressed()
}
한 타입은 여러 프로토콜을 채택할 수 있다니까 아래와 같이 해준다.
class DefaultDataSource: ButtonTextProtocol, ButtonPressedProtocol {
    var buttonText: String = "PROTOCOL"

    func buttonPressed() {
        print("Button was pressed")
    }
}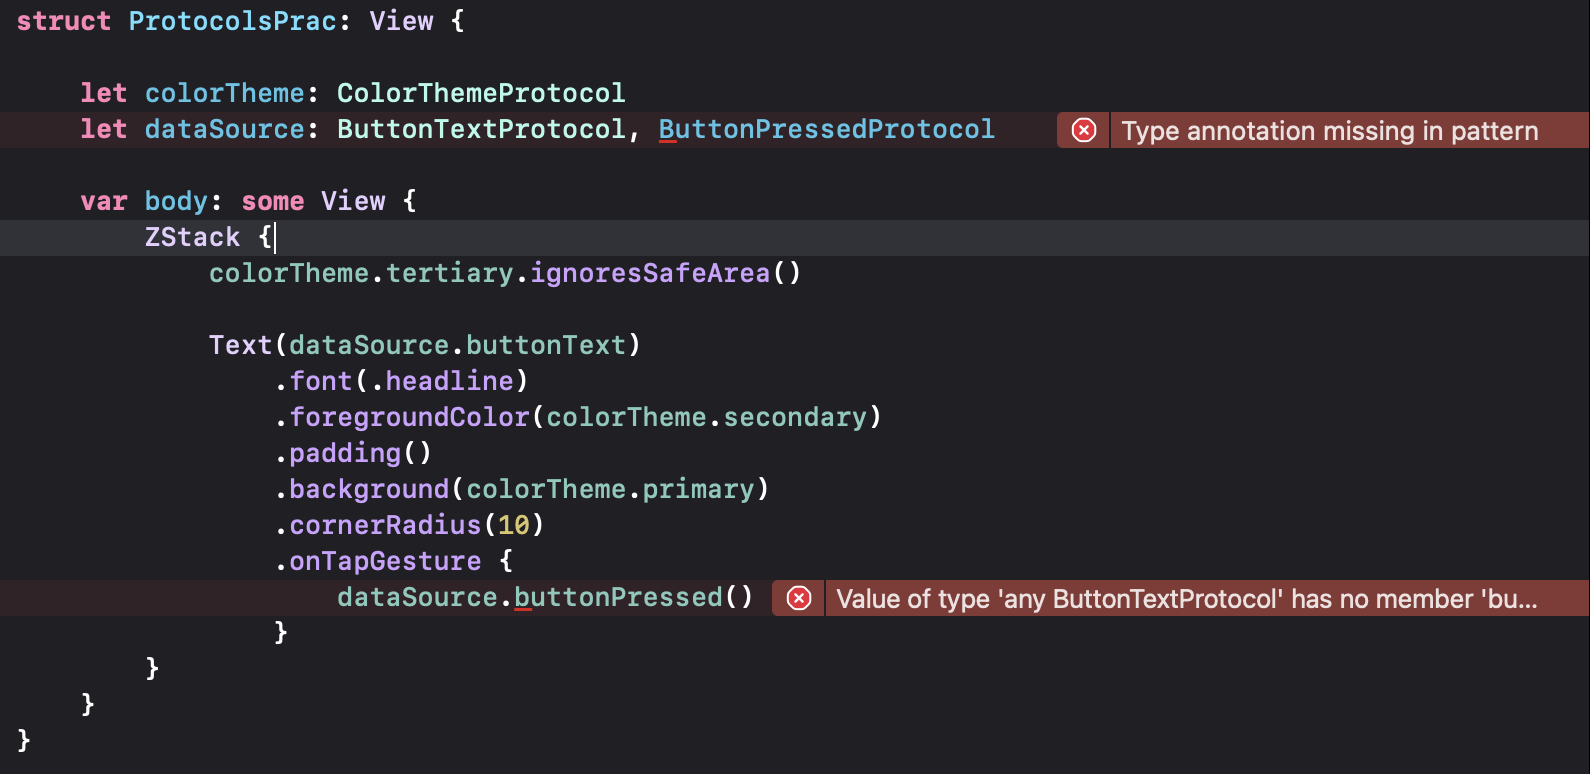
Type annotation missing in error가 발생한다.
여러 개의 프로토콜을 동시에 준수하는 타입을 명시할 때는 타입을 명확히 지정해줘야하기 때문이다.
내가 원하는 것은 ButtonTextProtocol, ButtonPressedProtocol을 둘 다 준수하는 타입이다. 따라서
아래와 같이 에러를 수정할 수 있다.
let dataSource: ButtonTextProtocol & ButtonPressedProtocol또 다른 방법으로는 두 프로토콜을 채택한 새로운 프로토콜을 만드는 것이다!
protocol ButtonTextProtocol {
    var buttonText: String { get }
}

protocol ButtonPressedProtocol {
    func buttonPressed()
}

protocol ButtonDataSourceProtocol: ButtonTextProtocol, ButtonPressedProtocol {

}
여기서 ButtonDataSourceProtocol은 기존 두 프로토콜을 채택하고 있고, 따로 추가적인 요구사항을 정의하지 않았다.
그래서 클로저 내부에 아무것도 없는 것이다. 이제 ButtonDataSourceProtocol을 채택한 타입은
ButtonTextProtocol, ButtonPressedProtocol 각각의 요구사항을 다 준수해야 한다.
class DefaultDataSource: ButtonDataSourceProtocol {
    var buttonText: String = "PROTOCOL"

    func buttonPressed() {
        print("Button was pressed")
    }
}

struct ProtocolsPrac: View {

    let colorTheme: ColorThemeProtocol
    let dataSource: ButtonDataSourceProtocol

    var body: some View {
        ZStack {
            colorTheme.tertiary.ignoresSafeArea()

            Text(dataSource.buttonText)
                .font(.headline)
                .foregroundColor(colorTheme.secondary)
                .padding()
                .background(colorTheme.primary)
                .cornerRadius(10)
                .onTapGesture {
                    dataSource.buttonPressed()
                }
        }
    }
}
이렇게 구현하면 코드도 깔끔해지고, 확실하게 두 프로토콜을 준수하는 타입을 할당해서 사용할 수 있게 된다.
프로토콜은 결국 추상화를 통해 객체 간 의존성을 낮춰 유연성과 재사용성을 높이는데 사용된다고 이해하면 되겠다.
우리가 계속 사용해온 View, PreviewProvider도 다 프로토콜이다.
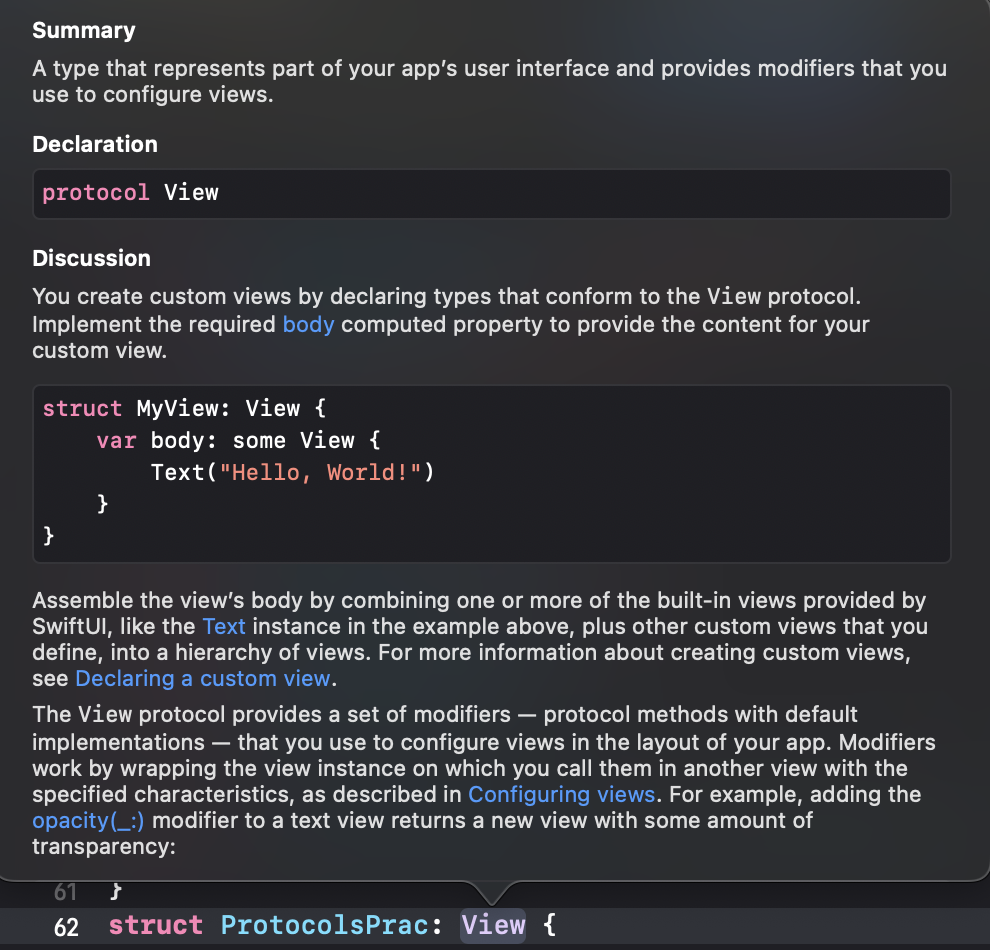
protocol View의 요구사항이 body라는 계산 속성이기 때문에 항상 body를 구현해 줬던 것이다.

의존성 주입에서 다시 보자 프로토콜!
'SwiftUI > SwiftUI(Advanced)' 카테고리의 다른 글
| 13. Dependency Injection vs Singleton / 의존성 주입 (0) | 2023.06.27 |
|---|---|
| 11. UIViewControllerRepresentable / UIImagePicker (0) | 2023.06.26 |
| 10. UIViewRepresentable / Custom TextField (0) | 2023.06.25 |
| 9. Custom NavigationView/Link (0) | 2023.06.25 |
| 8. Custom TabView / TabBar 커스텀 탭뷰/탭바 (0) | 2023.06.24 |


